How to make Darling Sweater Pumpkins
Here's one to pin!
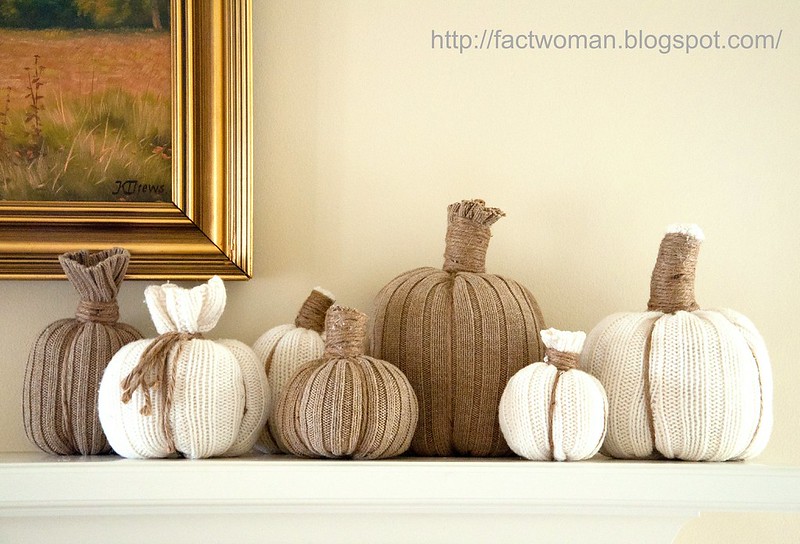
I've been spending some time on Pinterest, it's dangerous. I usually set a timer so I don't get lost there for hours browsing all of the amazing ideas. I was looking for some fall decor ideas and found lots of pictures of these darling pumpkins made from sweaters. I couldn't resist making a few. A quick trip to the Salvation Army store and Hobby Lobby and I was set. I paid $4.10 for 3 sweaters, $1.99 for the stuffing and $3.99 for the twine.
I learned a few things along the way though so here are step by step instructions on how to make them with my tips I learned the hard way through trial and error.
Here's what you'll need:

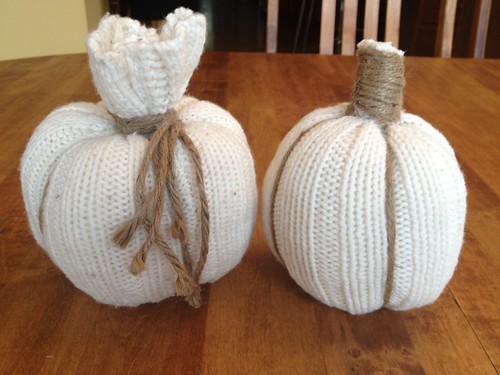
Pullover Sweaters- (XL Men's sweaters give you the most material to work with)- I found the heavier knits are more forgiving in terms of not showing lumps and bumps from the stuffing as easily. See orange pumpkin at botto
m of page!
Stuffing: I used a bag of loose poly-fill stuffing and also some old quilt batting. I also used the scraps of the sweaters that I wasn't using for pumpkins as stuffing.
Twine, string, dental floss, or even a heavy elastic band to close up the bottom.
Natural Jute 3 ply twine. I used this kind.
Sissors
Glue Gun
Steps:
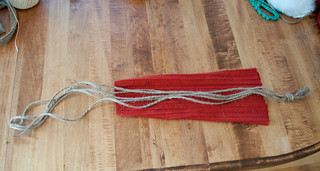
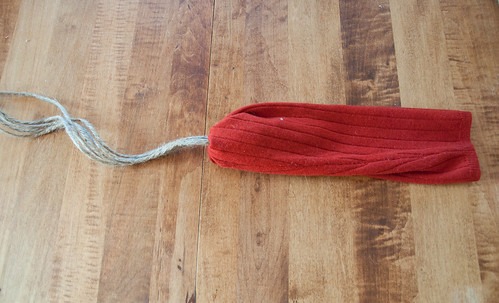
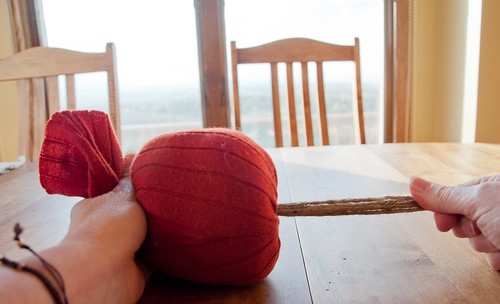
Find the parts of the sweater you'd like to use. The sleeves are really easy and you can get one larger and one small pumpkin from each sleeve, if you are careful. You can use the front and back as well. I cut a square from the front and a square from the back and sewed that square into a tube with my sewing machine. You can also use a glue gun. Fold the square in half, right sides together and run a line of glue down the edge to seal them together.
- Take the Jute and measure out 5 pieces that are about 2 to 3 times the length of the piece of sweater you are using. Tie one end of these 5 pieces together in a knot, to hold them together.
Turn the piece of sweater inside out so the seams are facing out.
Thread the pieces of Jute through the tube with the knot coming out what will be the bottom end of the pumpkin (the wider end).
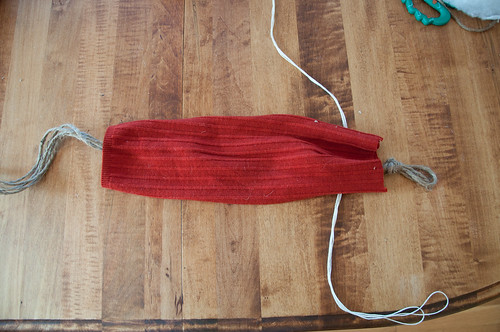
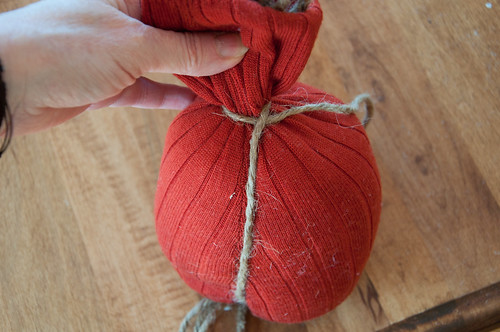
Take your twine or elastic band and tie the bottom of the tube very tightly. The Jute will be coming out of the center. I tie a knot then wrap the twine around then tie another knot.
Turn the tube right side out.
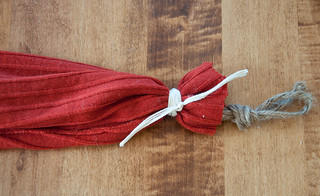
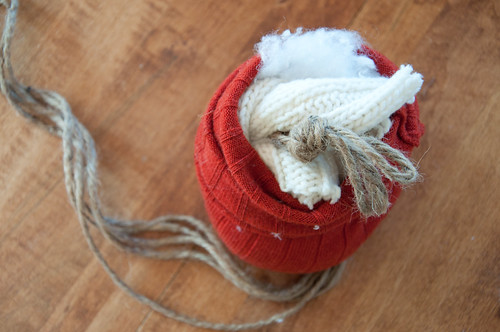
Time to stuff!!! As you stuff, you have to pull the knot up through the center to the height you will want the pumpkin to be, you'll see why in a minute. Stuff the pumpkin around the outside of the Jute. Here you can see I used some of the stuffing and some of the sweater scraps. I kept the stuffing on the outside and the sweater scraps on the inside, so it was smooth and un-lumpy.
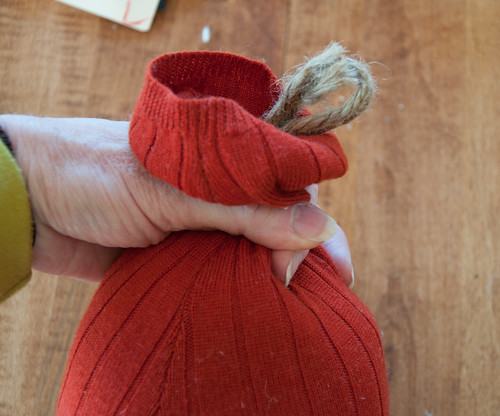
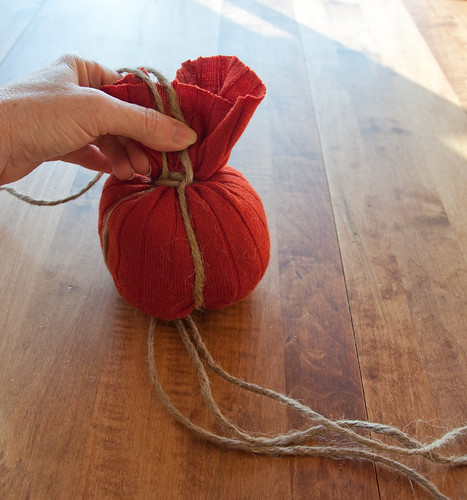
Once it's stuffed as much as you want, it's time to close up the top. Here's the SECRET!! You have to have the knot come up through where you tie it at the top. I grabbed the top with the knot above my hand then pulled the bottom strings to get the knot exactly where I wanted it to be deep at the base of the neck.
The knot is the key to having it look like a pumpkin! The first few ones I made I didn't have the knot above where I was tying the neck and the pumpkins didn't look like a pumpkin. See the difference? The advantage of a tutorial- I make the mistakes and figure it out so you don't have to!!!!
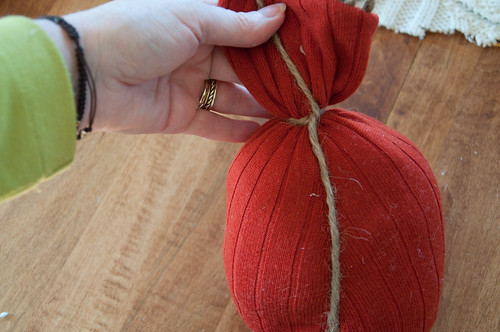
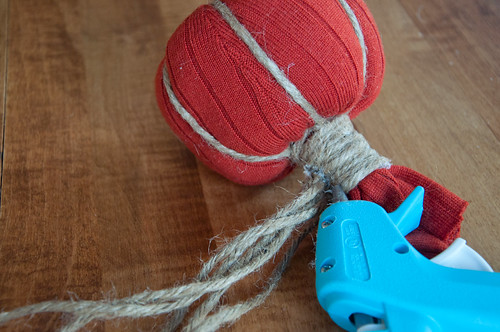
While holding the neck under the knot pull the ends so it's nice and tight.
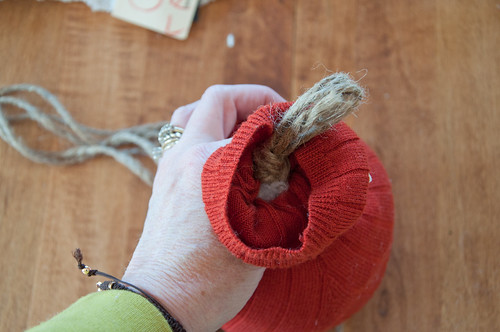
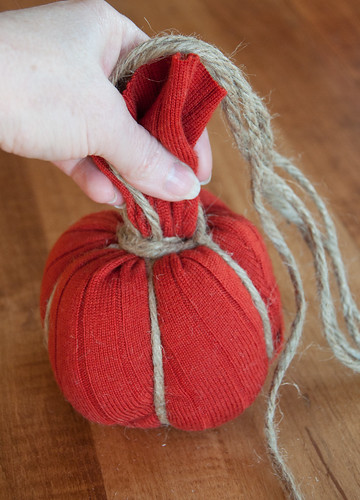
Take one of the jute strands and come up the side and wrap it around the neck. I threaded the end under the jute coming up and pull it tight to anchor. Pull it tight so that it pulls the side in a bit and pulls the knot down.
Repeat with each of the 5 jute strands.
Put a dot of glue where each string crosses itself.
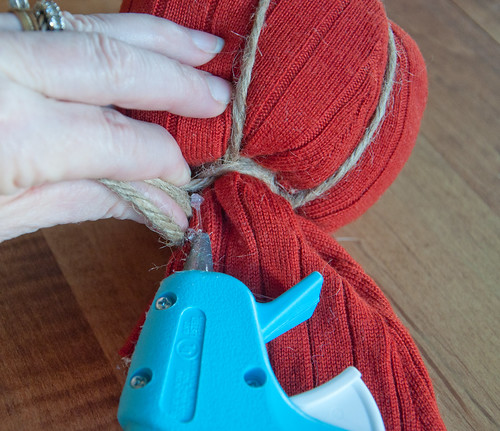
Begin to wrap the jute strands around the neck. On some I just tied them into a knot and left the ends hanging down. On some I took the 5 pieces, lined them up and used them to wrap the stem all the way up to the top.
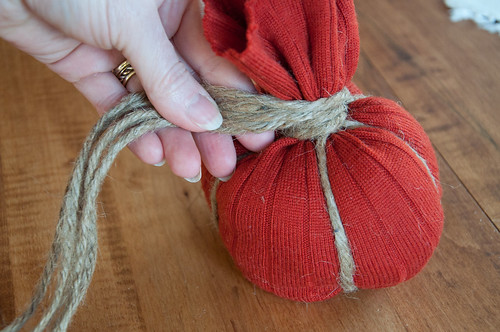
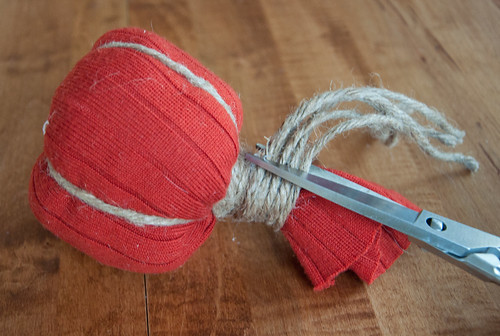
Once you've got the ends where you want them glue into place and trim the ends.
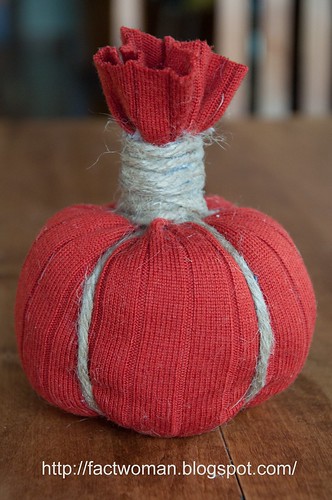
Trim the sweater to the style that you want. On some I wrapped up and inch or so and then left the top of the sweater lose and sticking up. On a couple of the white ones in the photo, I trimmed the top even with the jute. You can do it any way you want. You can also shape it, squeeze to make it taller and skinnier or push down and flatten to make it more short and squat.
I hope you enjoy making your sweater pumpkins!


1 comment:
What a cute idea and they look easy and fun to make. Thanks for the tutorial. :-)
Post a Comment