
 I just repainted my dining room. It went from dark and dreary to bright and modern looking. I used Restoration Hardware's Silver Sage. I'll admit, I only bought a small sample and had it color matched at Ace Hardware to save myself tons of money.
 New paint means new decor! Since I've always liked the look of plates hung on walls I decided to go for it. I bought plates at Goodwill, ARC, Salvation Army and also used some we inherited from my hubby's grandmother. They're all very different. I ended up with antique hand painted floral plates (grandma's) , mid century modern melamine, plain and embossed white plates and everything in between.
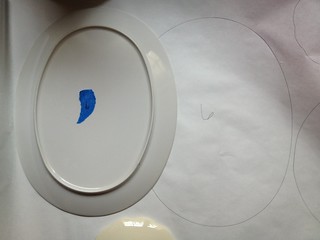 Once I had all the plates, I laid them upside down on freezer paper, traced each plate and cut them out. To keep the outlines all organized, I wrote a number on each outline and put a piece of tape with the same number on the plate. I also
drew a picture (like a 3 year old) of the plate's design on the paper
so I could tell which plates had a design and which ones didn't as I arranged them.
It's much easier to move paper outlines on a wall using tape than it is to try to arrange the actual plates on the floor or wall. You can see how they'll fit together and where they should go on the actual walls. You get them placed exactly where you want the first time and avoid the extra holes in the wall you get from making mistakes! :) Bonus!!
Once I had all the plates, I laid them upside down on freezer paper, traced each plate and cut them out. To keep the outlines all organized, I wrote a number on each outline and put a piece of tape with the same number on the plate. I also
drew a picture (like a 3 year old) of the plate's design on the paper
so I could tell which plates had a design and which ones didn't as I arranged them.
It's much easier to move paper outlines on a wall using tape than it is to try to arrange the actual plates on the floor or wall. You can see how they'll fit together and where they should go on the actual walls. You get them placed exactly where you want the first time and avoid the extra holes in the wall you get from making mistakes! :) Bonus!!
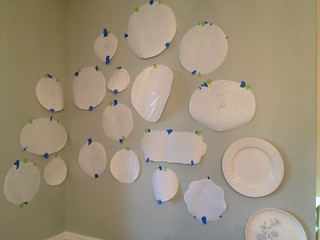 I spent a couple of days arranging and rearranging the paper circles on the wall.
 Note: Small pieces of painters tape do not hold paper up overnight. You'll get the paper outlines arranged just the way you want, only to find a pile of circles on the floor when you come down to take a fresh look at the design the next morning. Bummer! Use masking tape if you're going to play with them for more than an hour or so! Lesson learned, the hard way!
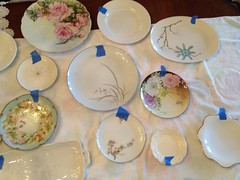 When I got the paper outlines arranged the way I wanted them on the wall, I laid the plates out on a table in roughly the same design to make it easy to grab the right one as I hung them. See their little numbers????
After getting the layout done, I started thinking about how to hang them. I knew I didn't want to use plate hangers, I don't like how you can see the little holders on the front plus they would cost tons more than most of the plates did. I found a few blogs where they glued hangers onto the back of the plate but, I really didn't want to damage the plates by permanently attaching something to their backs. What if I ever wanted to use them as plates again?
Then it hit me (ok I saw a roll of it in a drawer)... DUCK tape!!!!!! You can do ANYTHING with DUCK brand duct tape!!!!!
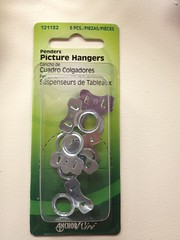
Once that was solved, I was a little worried about the pins or nails tearing through the tape, (some of the plates were really, REALLY heavy) so I bought some picture hangers like this. 6 for .99 cents to reenforce the tape.
I took one of the hangers, laid it on the tape, and rolled it up into the tape 2 times. There are two little points that stick straight up from the hanger so I pressed them through the tape and then hammered them flat so they wouldn't scratch anything. It secured the holders to the tape really well.
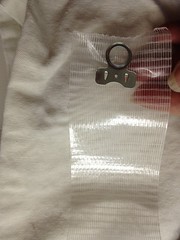
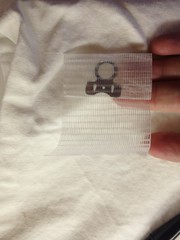
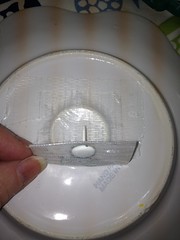 I pressed the strip of tape, with the hanger rolled in it, to the back of the plate and on the bigger plates added an extra piece of tape over the top to make sure the tape didn't come off. I then stuck an Upholstery Tack through the loop of the hanger and the tape.
To hang the plate, I lined up the plate with it's paper outline and gently pressed the tack into the wall to make a small hole where the tack needed to go. I removed the paper, lined up the tack with the hole and pressed on the front of the plate to push the tack all the way into the wall.
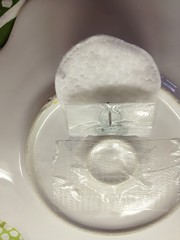
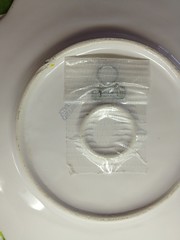
On plates that I wanted to be really careful with, I placed a small cotton pad, (like you use to remove your nail polish) between the head of the tack and the plate as a little cushion and padding between the plate and the tack. I trimmed it so it was only behind the tack not sticking out like this picture shows.
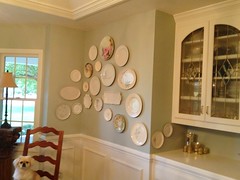
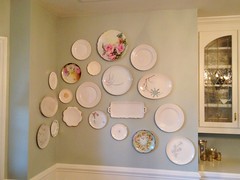
I love how it turned out! I left extra room in the design to add a few more plates as I find ones I really like.
Warning Will Robinson and everyone else: While I feel that the plates on my wall are very secure, I cannot promise or guarantee that this will hold all plates or your plates. As with anything hung on a wall- what goes up... might come down (and hit someone on the head, foot or other body part). If you try this method, do so at your own risk of injury or death! Ok- it probably won't kill someone but I want to be covered just in case! You choose the method that is best and safest for you, your family and your plates.
Your choice= your own risk. This completes our public service reminder!
1 comment:
Very pretty! I like your arrangement and how it trails off on the sides. It has a sense of movement. Great ideas on hanging them too.
Post a Comment