Showing posts with label Crafts. Show all posts

Thursday, November 12, 2009

A Square Toed Mary Jane Slipper Pattern- Crochet


OK, I've never written a pattern before so please forgive me if I have not done it correctly. As is my habit, I saw many patterns for Mary Jane slippers on the internet but they didn't look the way I wanted them to so I experimented with a few pairs and created this pattern. I love the squared off toe opening. They are really fast and easy to make. Have fun and enjoy the pattern. How perfect that this also is one of  Mama Kat's Workshop prompts this week for Writer's Workshop Wednesday! 2 birds with one post!!


Square Toed Mary Jane Slippers

Materials
  • 1 skein of worsted weight yarn. I used Vanna’s Choice 
  • A small amount of a contrasting yarn for trim- use some of that leftover yarn I know you have laying about.
  • Size H hook
  • 2 Buttons
Begin with a magic circle.


DC 8 into the circle.  Pull the little tail and your circle is made. Once you have formed the circle slst into the top of the first DC and ch 2


Round 2- place 2 DC into each stitch, slst into the top of the first DC, ch 2 (16 stitches)

Round 3- 1 DC into same stitch, 2 DC into the next stitch, *1 DC into next, 2 DC into next to the end of the round, slst into the top of the first DC and CH2 (24 stitches)

Round 4- 1 DC into the same stitch, * 1 DC into next 2 stitches, 2 DC into next, 1 dc into next two stitches and 2 DC into next, repeat until you have 3 stitches lest and single crochet each of them. (31 stitches) For slightly wider foot go ahead and DC 2 in the last stitch for 32 total.

Round 5 Work 1 DC in each stitch around, slst in top of first DC and chain 2
Round 6 Work 1 DC in each stitch around, slst in top of first DC and chain 2

Row 7- DC into the first 22 stitches and chain 2. Turn work. You will be leaving the rest of the stitches unworked and just going back and forth on these 22. When you turn the work, the two chains in the turning chain you just made count as the first double crochet of the new row. So you will want to skip the first DC double crochet and work a double crochet in the second stitch. Be sure to insert hook under top two loops of stitch. Work a double crochet in each remaining stitch across the previous row; at the end of each row, be sure to work the last double crochet in the top of the turning chain from the previous row. Be sure to insert hook in the center of the V (and back bump) of the top chain of the turning chain
Rows 8- Turn work, DC in second stitch and work across making sure to Dc in the turning chain from previous row.
Rows 9, 10 , 11 , 12, and 13- Repeat row 8

Row 14- After chaining 2 and turning work, make your first DC in the first stitch (By making a stitch into the first stitch, you will be increasing the number of stitches by one for a total of 23 stitches.) and work across the row making sure to work the top look of the turning chain from the previous row. Chain Row Row 15- repeat row 13- 24 stitches
Row 16- repeat 13- 25 stitches
Row 17 repeat 13- 26 stitches
Row 18- Turn work, DC in second stitch and work across making sure to Dc in the turning chain from previous row.- 26 stitches
Row 19- Turn work, DC in second stitch and work across making sure to Dc in the turning chain from previous row.- 26 stitches
Row 20- DC 5, hdc 4, sc 8, hdc 4, DC 5- This helps round off the heel.

The length of the slipper is determined by the number of rows that you do. For a shorter foot, stop at row 16 and then do row 20, longer, stop at row 17 or 18 then end with row 20. 20 rows is equivalent to a size 8 or 9 woman’s.


Seam up the heel by putting right sides together and slip stitching from the top to the bottom of the heel by putting the crochet hook through the back loop of the side closest to you and the front loop of the back half, to make a nice even seam.

Finishing the top edge:
Still using the same color yarn as the slipper; Begin at the center of the back of the slipper. SC the center back 3 stitches together, SC4, SC2 tog, SC6, SC2tog, SC to stitch before corner. SCthe last stitch of the side and the fist stitch of the front together (the 2 corner stitches), SC across the toe, SC the 2 corner stitches together. SC down the side until you have 14 stitches left, SC2tog, SC6, SC2tog, SC4. You don’t have to follow this exactly. All you are doing with the SC2tog is making the top edge more snug so that the slipper fits and doesn’t slide off. Making your decreases on the back half of the slipper helps it to fit better.
When you get back to the beginning, Slst into the beginning stitch and weave in end.

Contrast and Strap
Put the slipper on your foot and see how well it fits. If the fit is still too loose, you will need to add a couple of SC2togs to this last contrast row to tighten up the fit.
With your foot in the slipper, take the end of your contrast yarn and figure out where you want the strap to go across.


Once you can see where you want the strap to be, place your crochet hook through the stitch on the outside side of the slipper . This is where the strap will come across. To the button.
Begin SC from that point around the front of the slipper, at each corner SC the 2 stitches from each side of the corner together . SC around
to the opposite side of the slipper from where you started. If you started the strap 16 stitches from the front on the beginning side, SC 16 on the opposite side so that the strap will go across evenly.


Chain 20 to 21 stitches depending on how wide your foot is.
I try the slipper on and see if the strap is as long as I want it to be. Turn and begin working back into the chain. SC in the first stitch from the end, SC, chain 4 to 6 (the diameter of the button)


skip the same number of stitches in your strap as you just crocheted and SC into that stitch. So if you have a 1” button you would chain 4 and then skip 4 stitches down on the strap before reconnecting the small chain you just made. This creates the Button Hole.

SC back down the strap to where you began it. SC in that same stitch on the slipper then continue around the back of the heel to where you started. This is back half of the slipper is where you would add some additional SC2togs if you needed to tighten up the fit. Sl st in the beginning stitch and weave ends in.
Sew your button onto the outside of the slipper and you are done!

Saturday, August 29, 2009

Photo of the day 29

For the photo of the day challenge here is a shot of the yarn that I am going to start a project with tomorrow. I am designing a ruffled neck warmer and will keep you updated on how the design is coming along.


To see some other great photos, head over to The Byron Life. Her Photo of the day challenge has many great photographers and photos to check out.

Wednesday, August 26, 2009

Writer's Workshop Wednesday- Crafts

It's Wednesday and today's Writer Workshop topic is my favorite summer craft. For more prompts, click on the button above to go to Kat's. Try it, you'll like it!

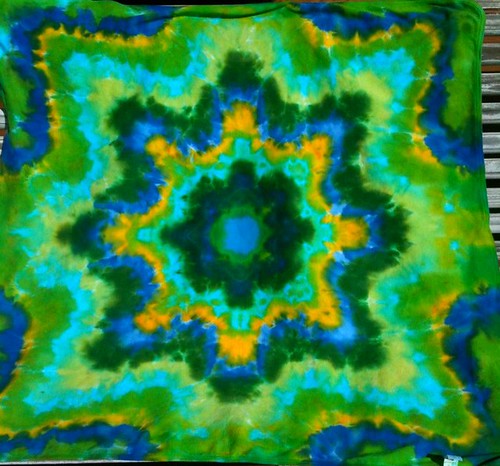
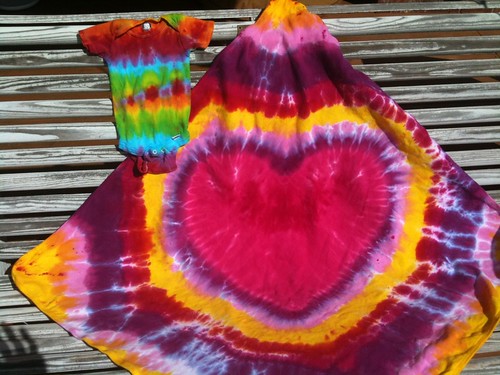
My favorite summer craft would have to be the Tie Dye that we did. My daughter and I tie dyed shirts, dresses, swim covers and my favorite thing, baby items. My favorite project was a set of onesies, burp cloths and a baby blanket for friends who just had a baby boy.


Her is the set my duaghter made for friends who are having a girl.

The runner up project would have to be the Mary Jane slippers that I made for my daughter. I didn't like the pattern so I had to rewrite it. I hope to get it posted for everyone soon.

Right now I am bust working on a bow tie neck warmer. It's a pattern from the 1940's and a ruffled Neck Warmer that I saw a photo of and refuse to pay for a pattern so I am designing one that should be very close. I'll get these posted as soon as they are all written out and finished so that I can post photos for them.

Wednesday, August 12, 2009

Photo of the day! Day 12


I just started a pair of slippers today. I don't care how warm it is outside, my feet are always cold I am taking a pattern that I kind of liked and reworking it into one I like more. Once I work all of the kinks out, I'll post the new Pattern and photos of the process.

Wednesday, August 5, 2009

Bleach Stenciling for the Writer's Workshop Wednesday

It's Wednesday and that means that it's time for the Wednesday Writer's Workshop by Mama Kat This weeks options were:

1.) What's ailing you? Diagnose yourself with a syndrome. (inspired by Kimberly from Kamp KK
2. Share with us something you made by hand. (inspired by Texan Mama via email)
3. Fess up. Tell us what you found after spying on someone.(inspired by The Scattered Mind of a Tattooed Mini Van Mom)

4. "How are y'all doing it? This summer, I mean? I cannot remember ever being as busy as we've been over the past two months. Those of you who are blogging daily, being as witty and entertaining as ever...I beg of you...HOW?" (inspired by Lula of Lulaville)
5. What are you afraid of? (inspired by Life with Kaishon)


I went with Topic #2!!!!
I've been playing around with bleach stenciling on t-shirts the last few weeks.
If you have never bleach stenciled then you really should click on this link for my easy to follow instructions and join in on the fun.

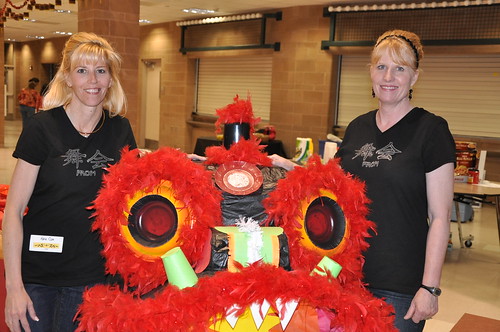
I made the cutest girl robot shirt for one of my daughters to wear and of course was in a hurry and didn't photograph it. Same with the turtle one I made for a friend's baby. It's the same technique that I used to make the after prom shirts for my friend Gina and I, shown below. We also made the dragon!!!


I'm also working on a sweater that is pieces of 6 other sweaters all serged together. I'll post more about that later. For now I am having a blast playing with colored T-shirts, butcher paper and a spray bottle of bleach.

Friday, May 15, 2009

How To Bleach Stencil T-Shirts- A Tutorial

We are still in the midst of hell week and because I didn't have enough to do, I decided to make T-Shirts for my friend and I to wear while we serve food to all of the hordes of teenagers at After Prom. We both had been thinking about what fun costume we could wear to go along with the theme of Asian Nights. I have a gorgeous turquoise kimono that would have been perfect except for the fact that the long sleeves would catch fire in the ovens and would trail into the nacho cheese dip as we poured it into the nacho fountain. That left us with our regular clothes. A friend of mine, Amy, posted a link to a picture of some really cute shirts made by cutting out a stencil and then using bleach with it. I thought I would give it a try.

Here is how to Bleach Stencil a shirt.

Materials:
A cotton or a cotton blend shirt. I used a blend because I wanted the color change to be less dramatic.
A small spray bottle- The best are the small travel sprayers from Walmart which are 99 cents. The bottle must have a super fine spray.
Bleach
Butcher or Freezer Paper- I like Reynolds Brand
X-acto Knife to cut stencil
Computer printer

Find a picture that you would like to make a stencil of on your computer. You can either cut a piece of the butcher paper to an 8.5X11" sheet and print onto the non-shiny side or print it onto a regular piece of paper. If you have used plain paper, tape it on all 4 sides to the non-shiny side of a piece of freezer paper and place the freezer paper on top of a stack of newspapers for cutting. If you want to make more than one stencil, stack 2 sheets of butcher paper, taping then to each other so that they do not shift and then cut out both at the same time.

With an X-acto knife, cut out the stencil along each of the lines. For letters like P or O, save the small center pieces to place on the shirt later to make the letters complete.

Once the stencil is all cut out, take a iron set to the hottest temperature with NO steam. Carefully press the stencil onto the shirt making sure to get the edges well sealed. Add the centers to any letters and iron them on as well.


Once the stencil is ironed on, insert cardboard or a paper bag into the shirt to prevent the bleach from soaking through to the back of eh shirt.

Cover all parts of the T-Shirt except the stencil to prevent overspray from getting on any other parts of the shirt.

Take your spray bottle and add one part bleach and 2 parts water. For hard to dye shirts, like dark colors or poly blends a 1 to 1 ratio works better. The spray bottle has to have a very fine even mist when it sprays. Large drops will leave uneven bleaching. This bottle from Walmart has the best spray.

Lightly spray evenly over the open parts of the stencil until the fabric is damp. I use a paper towel to blot up any extra spray from the paper stencil. Let the fabric dry. The lighter you spray, the better. If you get the fabric too wet, it will seep under the stencil and your lines will not be very crisp. Repeat until the color inside the stencil is as light as you want. On a cotton shirt it will take anywhere from 2 to 6 spray sessions. On a cotton poly blend it can take up to 8 or 10 depending on how dark the shirt is. For my shirt, I set it outside in the bright sunshine while I sprayed and let dry. The sun slows down the bleaching in the exposed areas while the edges under the paper got much lighter. It really created a great look.

Note: as the bleach dries, it will leave a white residue that will make it look lighter than the fabric really is so make sure you do enough sprays to get it as light as you want your fabric.

Once the last bleach spray has dried, slowly peel off the paper stencil. It will still have the residue from the bleach on the fabric.

Rinse the shirt in very warm water being careful not to get the bleach on other parts of the shirt. add a bit of soap to the rinse water and then rinse completely. Toss into the washer with some old towels and run through a full cycle. The shirt can be dried on a line or in the dryer and is now ready to wear.

This is a very easy project. Have fun creating all kinds of fun shirts with this method.