Showing posts with label Recipes. Show all posts

Thursday, March 21, 2013

Crunchy Banana Nut Muffins with Coconut

I love this muffin recipe. You can make a batch and they stay fresh in the fridge for a week or so. They're perfect for a grab and go breakfast on your way out the door. They also freeze beautifully.
3 cups all-purpose flour
1 3/4 cups white sugar
1 teaspoon baking soda
2 teaspoons baking powder
3/4 teaspoon salt
3/4 cup milk
2 eggs, lightly beaten
1 teaspoons vanilla extract
1/2 cup melted butter, cooled plus 1/2 cup applesauce  OR 1 cup melted butter                                    
3 bananas- mash 2 with a fork and dice one
1 cup chopped pecans (you can also use walnuts or almonds)
1 cup granola- any kind is fine
1 cup shredded coconut plus 1/4 cup shredded coconut to top muffins with before baking.
  • Preheat oven to 350 degrees F (175 degrees C)
  • Melt 1/2 cup of butter and set aside to cool. (or 1 cup if you are skipping the applesauce)
  • Line 24 muffin cups with paper liners.
  • In a medium size bowl stir together your dry ingredients: flour, sugar, baking soda, baking powder, and salt. 
  • Mash 2 bananas with a fork and chop the remaining banana
              
  • In a separate bowl whisk the eggs lightly then add the remaining wet ingredients: milk, vanilla, melted butter, apple sauce, and the mashed bananas- save the diced banana for just one more step. 
  • Add the wet ingredients to the dry ingredients and stir just until combined. There will be a few lumps. 

  • Fold in the diced banana, granola, nuts, and 1 cup of the coconut. 


  • Scoop into the prepared muffin cups and sprinkle the top with the remaining coconut.
  • Bake 20 to 25 minutes in your preheated oven, until a toothpick or knife inserted in the center of a muffin comes out clean.
Makes 24 muffins

Wednesday, March 6, 2013

Salted Caramel Pudding or Butterscotch Pudding Recipe

My daughter Hannah came for a visit the other night and was hungry for Butterscotch pudding. I of course had every flavor of boxed pudding except that one so I got on the internet and looked at dozens of recipes and took the three I liked best and combined them into this one. It is the perfect combination of salty and sweet and buttery caramel butterscotch flavors. It tastes like salted caramels. Start to finish in under 15 mins. Hannah was thrilled but is sad that I've ruined her for boxed pudding. It's scary to think that we came so close to settling for a box and never discovering this amazing pudding!

  Hannah's Butterscotch Pudding

  • 3 1/2 cups milk- 1%, whole or what ever you’ve got (For a richer pudding use 2 1/2 cups milk and 1 cup cream
  • 1 stick butter
  • 1 1/4 cups light brown sugar packed
  • 3 egg yolks
  • 1/3 cup cornstarch
  • 1/8 teaspoon salt
  • 2 teaspoons vanilla extract
Directions
·      Separate 3 eggs and put the 3 egg yolks into a medium bowl. Set aside.
·      Stir 1/2 cup cold milk with 1/3  cup corn starch until a smooth paste. Set aside.
·      In a microwavable container, add 3 cups milk (or cream and milk mixture) and Microwave for 2-4 minutes until skim forms on top and milk is hot.  Remove and set aside.
·      In a large, heavy saucepan, over medium heat, melt the butter. Stir in the brown sugar, raise the heat to medium-high, and cook 3 to 7 minutes, stirring constantly, to caramelize the mixture. You'll smell a characteristic nutty-caramel odor when the butter browns, signaling that the mixture is ready. Turn heat down to medium.
·      Immediately, gradually add the hot milk into the butter/brown sugar mixture stirring constantly.
·       Take the egg yolks and whisk in about 1/2 cup of the hot mixture. Whisk in the cornstarch paste and salt until dissolved. Whisk the cornstarch/ egg yolk mixture back into the hot mixture in the saucepan. Whisking constantly, cook over medium-high heat until pudding is thick and just boiling. You will know that it’s done and  thick enough when the spoon leaves trail marks on the bottom of the pot and the mixture will have a few large bubbles boiling up to the top.
·      Turn off the heat and whisk in the vanilla extract. Pour into one bowl or 6 to 8 ramekins, or mugs and  press waxed paper over the top to prevent a skin from forming. Serve warm or chill at least 2 hours or overnight. Warm or cold it's delicious.I had it with a small dollop of whipped cream. I think I'm going to put some chocolate shavings on it next! 

Tuesday, December 20, 2011

Peanut Butter Blossom Cookies


These cookies are chewy and peanut buttery and delicious. You can use a Hershey's chocolate kiss in the middle or a Brach's Chocolate Stars. I like the stars because they come in milk or DARK chocolate and as far as I'm concerned, the darker the better when it comes to chocolate. We love these not only at  Christmas but any time of the year.
Ingredients
• 48 Hersheys' Kisses or Brach's Chocolate Stars
• 1/2 cup butter
• 3/4 cup Creamy Peanut Butter
• 1 cup packed light brown sugar
• 1 egg
• 2 tablespoons milk
• 1 teaspoon vanilla extract
• 1-3/4 cups all-purpose flour
• 1 teaspoon baking soda
• 1/2 teaspoon salt
• Granulated sugar to roll dough balls into before baking
Directions
  1. Preheat oven to 375 degrees
  2. Beat butter and peanut butter in large bowl until well blended. 
  3. Add 1/3 cup granulated sugar and brown sugar; beat until fluffy. 
  4. Add egg, milk and vanilla; beat well. 
  5. Stir together flour, baking soda and salt; gradually beat into peanut butter mixture.
  6. Shape dough into 1-inch balls. Roll in granulated sugar and place on ungreased cookie sheet.  Do NOT put the chocolate on the cookie yet.
  7. Bake 8 to 10 minutes or until lightly browned. 
  8. Remove from oven and immediately press a chocolate into center of each cookie, the cookie will crack around edges. 
  9. Remove from cookie sheet to wire rack. 
  10. Cool completely. 
Makes About 4 dozen cookies

Thursday, November 18, 2010

Holiday Cranberry Tart- A festive and delicious make ahead dessert.

This is a yummy recipe that I got from Bon Appetit magazine 3 years ago. The combination of the clean fresh taste of cranberries and fresh ginger, a creamy mascarpone cheese filling and the crisp chocolate cookie crust is divine.  If you don't like chocolate you can use vanilla cookies for the crust.

The best thing is that you make all of the components 2 to 3  days ahead of time and then assemble them just before serving. It's actually better when the cranberry part sits for a few days, but if you want to do it all the day of you can.


Cranberry Chocolate Tart 
Bon Appetit Nov. 2007
Click here for a printable version of this recipe
Cranberry Topping:
1/2 cup cranberry juice, divided
1 teaspoon unflavored gelatin
1- 12-ounce bag fresh or frozen cranberries
3/4 cup sugar
2 teaspoons fresh lemon juice
1 teaspoon finely grated lemon peel
1 teaspoon grated peeled fresh ginger
Pinch of salt
4 tablespoons finely chopped crystallized ginger

Crust:
1 1/4 cups chocolate wafer cookie crumbs (made from about 6 1/2 ounces cookies, finely ground in processor) You may also use vanilla wafer cookies or shortbread cookies instead.
1/4 cup sugar
1/8 teaspoon salt
5 to 6 tablespoons unsalted butter, melted

Mascarpone Filling:
1- 8-ounce container mascarpone cheese- an Italian cream cheese you can find at most stores now
1/2 cup powdered sugar
1/2 cup chilled whipping cream
1 teaspoon vanilla extract
Thin strips of crystallized ginger (optional garnish)

Preparation
Pour 1/4 cup cranberry juice into small bowl; sprinkle gelatin over. Let stand until softened, 15 minutes. Combine 1/4 cup cranberry juice, cranberries, and next 5 ingredients in medium saucepan; bring to boil, stirring until sugar dissolves. Reduce heat to medium; simmer until cranberries are tender but still plump, 5 minutes. Strain into bowl; set cranberries aside. Add gelatin mixture to hot juice in bowl; stir until gelatin dissolves. Stir cranberries back into juice. Chill until cranberry mixture is cold and slightly thickened, at least 8 hours or overnight. DO AHEAD: Can be made 2-3 days ahead. Cover and chill.

Stir chopped crystallized ginger into cranberry mixture one hour before assembling.

For crust:
Position rack in center of oven and preheat to 350°F. Combine chocolate (or vanilla) wafer cookie crumbs, sugar, and salt in medium bowl; add 5 tablespoons melted butter and stir until crumbs feel moist when pressed together with fingertips, adding remaining 1 tablespoon melted butter if mixture is dry. Press crumb mixture firmly onto bottom and up sides of 9-inch-diameter tart pan with removable bottom. Bake chocolate crust until beginning to set and slightly crisp, pressing with spoon if crust puffs during baking, about 14 minutes. Transfer tart pan to rack and cool crust completely before filling.

For mascarpone filling:
Using electric mixer, beat all ingredients except ginger in medium bowl just until thick enough to spread (do not overbeat or mixture may curdle). Cover and chill.

Assembling Tart: Up to 6 hours before serving
Spread mascarpone filling in crust.
Spoon cranberry mixture evenly over mascarpone filling.
Chill at least 2 hours and up to 6 hours.
Garnish with crystallized ginger strips, if desired.
Cut tart into wedges and serve cold.

Friday, November 12, 2010

A Hearty Chili recipe for a cold snowy day.

Fact Woman’s Beef Chili with Beans
We love chili. There is nothing more comforting and cozy that a chili dinner on a cold winter day. It is hearty, filling and delicious. I like using a combination of different beans, mainly because I think that kidney beans are just kind of grainy and smooshy. It’s a texture issue. . The combination of beans gives this chili texture and  a variety in looks and taste.
1 pound of ground beef
1 medium onion chopped
2 1/2 TBS chili powder
2 1/2 TBS cumin
2 tsp smoked paprika
1/2 tsp to 1 tsp of chipotle powder or as much heat as you want
1- 15 oz can of ground tomatoes
1- 15 oz can of Kuner’s black beans with cumin and chili spices or just a can of black beans
1- 15 oz can of chili beans
1- 15 oz can of great Northern Beans- drained and rinsed
2- 15 oz can of red kidney beans- drained and rinsed or 1- white kidney beans & 1 red
salt and pepper to taste
3-4 tbs of brown sugar

Brown the ground beef and chopped onions in a medium stock pot or large deep pan until meat is cooked through and the onions are softened.
Drain and rinse the Kidney and Great Northern beans. Don’t drain the black and chili beans
Drain off some of the fat leaving about 2 tbs in with meat.
Add all the spices and stir until they are mixed into the meat completely, about 1 minute.
Dump in the tomatoes, chili beans and the black beans and then add the kidney and great northern beans and stir until combined. Add salt and pepper to taste.
Bring to a simmer, cover and reduce the heat to med low and let simmer for 30 minutes.

Thursday, July 8, 2010

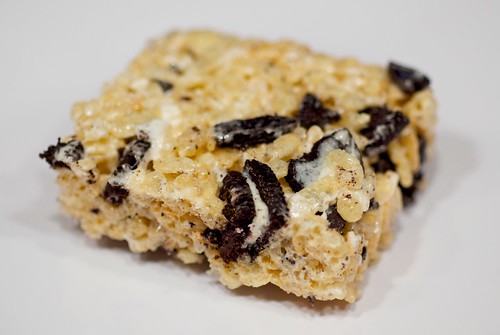
Oreo Rice Krispies' Treats

As far as I'm concerned, if you have teenagers, you should always have the ingredients for Rice Krispies' treats in your pantry. A box of the cereal and a bag of marshmallows and you can be ready to feed a group of hungry kids in under 10 minutes. I have relied on them for years! It always seemed like a group of kids would show up late at night and be hungry for something sweet. I could grab the bag and the box and have them made before they ate us out of house and home.

A couple of weeks ago, my son, Tom, called and said he'd seen some rice treats with Oreo cookies chopped up in them and asked if I could make them. I did and they were amazing!!!!

I took the traditional rice cereal treat recipe and added chopped up oreos.

1- 10oz bag of marshmallows
3 TBS butter- I never add the butter but my friend Gina does because everything's better with butter.
6 cups of crispy rice cereal
15- oreos or chocolate sandwich cookies, chopped into 4ths or 6ths.
  • Chop or break the cookies into quarters or sixths.
  • Spray a 9x13" pan with vegetable spray. 
  • Spray a large microwaveable bowl with vegetable spray (Pam)
  • Add the bag of marshmallows (and butter if you're using it) and microwave on high for 1 1/2 minutes- stir, and microwave for another 30 to 90 seconds until it is all melted and smooth when you stir it.
  • Pour the cereal and the cookie pieces into the bowl of melted marshmallows 

  • Stir until it's all combined. 
  • Press into the greased 9x13" pan and let harden for 30 minutes- we never wait!! We love eating it while it's all warm and gooey!
How many things that taste this good can you make in under 5 minutes? None!! Hope you like them as much as we do!

Tuesday, July 6, 2010

Random Tuesday- Coffee, Ammunition and Pillsbury Brand Ambassadors

It's Tuesday and since I've been such a blog slacker I thought I better get back in the habit of posting and get Random. Get Random yourself over at randomtuesday hosted at The Un Mom!

We had a fabulous trip to Greece and England. Great food, fun new places to see and a really special time with our youngest daughter/high school graduate. We have really enjoyed these trips with each child and I for one am sorry that this was the last one.

All my kids were in from Seattle, for a wedding last weekend. In preparation for their visit I cleaned the house and more importantly, I cleaned the front door. Yes, they would be coming and going through the garage but it seemed really important at the time to clean the outsides of the front doors.  It's all about priorities! Or would that be a mental illness????????????

On our way to the mountains 2 weeks ago we passed a small coffee shop in a very small town. I wish I'd brought my camera with me to take a picture of the sign out front. It said:
Coffee
Espresso
Ammunition
I guess that the ammo is for those people who haven't had their morning caffeine yet!

All I can say is that the iPad rocks. It was the perfect thing to travel with. Email, internet, photo storage, games, movies and books all in an nice size package. I was worried that once we got home I wouldn't use it as much but the opposite is true, I may be using it more than my laptop. I'm in love!!!!!!!!!!! I am kind of an electronics nerd. I guess that's what 29 years of marriage to an electrical engineering major will do to you.

About a month ago, I filled out an application to be a Pillsbury Crescent Roll Brand Ambassador. I thought it sounded fun. I figured that they got thousands of applicants and that would be that. Well, a couple of weeks ago, I got a call from them and I was one of the 100 quarter finalists. I did a phone interview with her and had to send in a picture of myself and 2 of my favorite original crescent roll recipes: one special occasion item and one main course. Both had to be prepared in 30 minutes or less- including baking time!!!! Harder than it sounds. I sent in my 2 recipes and photo. Last week they called to ask me for one more recipe. It seems that I am one of the 12 semi- finalists. They will be picking 4 out of the 12 for a national campaign and national vote. I would LOVE-LOVE-LOVE to be one of the 4 but I'm trying so hard not to get my hopes up!!!!! I'll let you know how it goes. I'll either be leaping for joy or dripping tears onto my keyboard when I let you know the results! 
One of the recipes I submitted was this one! 

Apple Rosemary Blue Cheese Bites
Warm apple slices with blue cheese and pecans and a hint of rosemary, all wrapped up in a flaky crust. Perfect for a cocktail party or as an appetizer before a special dinner.

1- 8 oz. package of Pillsbury Crescent Rolls
2 large golden delicious apples- Peeled, cored and sliced into 8 slices each
4 oz of crumbled blue cheese
2 TBS of cream cheese- softened
½ tsp fresh or dry rosemary chopped fine
¼ cup of chopped pecans or walnuts (optional)

• Preheat your oven to 375 degrees.
• Grease a cookie sheet or line a cookie sheet with parchment paper.
• Peel, core and slice your apples
• In a small bowl stir together the blue cheese, cream cheese, nuts and rosemary until the mixture hold together.
• On a piece of parchment or plastic wrap, unroll the Pillsbury Crescent Roll dough and Divide into 8 triangles. Cut each triangle into half for 16 smaller triangles.
• Spread 1-2 teaspoons of the cheese mixture on the wide end of a triangle and wrap around an apple slice.
• Place on the prepared baking sheet
• Bake in your preheated oven for 20 to 22 minutes or until they are golden brown.

Serve warm or room temperature.
These can also be made with fresh pears instead of apples.

Thursday, May 27, 2010

Raspberry Or Strawberry Topped Brownies


Chocolate and raspberries or brownies are the perfect combination as far as I'm concerned. This is a great dessert that is easy enough for everyday but nice enough for company . I came up with this recipe when I needed to make 50 servings of a dessert for a school event. I didn't have time to bake so I bought store made brownies, some berries and came up with these delicious confections. They were gone in minutes and talked about for hours. While you can make the brownie part from a box or buy them at the store, they're even better when you make them from scratch.
Best Brownies Ever
  • 1 cup butter
  • 2 cup white sugar
  • 4 eggs- lightly beat before adding
  • 1 1/2 teaspoon vanilla extract
  • 2/3 cup unsweetened cocoa powder
  • 1 1/4 cup all-purpose flour
  • 1/2 teaspoon salt
  • 3/4 teaspoon baking powder

  1. Preheat oven to 350 degrees
  2. In the microwave or in a pan on the stove, melt the butter and set aside to cool. 
  3. Into a bowl sift together the flour, cocoa, salt and baking powder- set aside Grease a 9x13" pan well. 
  4. Add the sugar to the melted butter and stir until combined then add the eggs and the vanilla. Beat well.
  5. Add the dry ingredients and stir just until combined. Don't over beat. 
  6. Pour the batter into the greased pan and bake for 25 to 30 minutes until done. 
  7. Cool completely before putting the frosting on. 
Strawberry or Raspberry Frosting
  • 3/4 cup softened butter
  • 4 cups powdered sugar
  • 1 tsp vanilla
  • 1/4- 1/3 cup strawberry or raspberry puree. (I take 1 cup of fresh or thawed frozen fruit and put it into a blender and blend until smooth. This will yield about 1/2 cup of puree. Any extra puree left over, I freeze in a ziplock bag ready for the next batch of fruit frosting that I make)
In a large bowl cream the butter until it is light and fluffy. Add the powdered sugar, vanilla and 3 TBS of the fruit puree. Beat until it comes together. Continue adding the fruit puree one tablespoon at a time beating after each addition until it is the consistency that you want. Frost the brownies by spreading over the top or for a fancier presentation, place the frosting into a zip lock bag that has a large star tip in the cut off corner. Pip a swirl onto the top of the precut brownies. Top with a raspberry or slice of strawberry. 

Wednesday, March 31, 2010

Moist Delicious Shortcake for strawberries or any fruit.

 I am not a fan of the dry crumbly biscuit style of shortcake. I want a moist tender cake for my berries. 16 years ago, we ordered the strawberry shortcake at a Black Eye Pea restaurant and I was in heaven. It was the perfect cake for berries. I had to have the recipe and with a bit of flattery and begging, the chef shared the recipe with me. The one catch was, he had to leave one ingredient out to give it to me. Thankfully, he made it easy when he told me that it was a vanilla cake and guess what ingredient was missing? It's what we always have on Easter and is one of our favorite spring and summer treats.  It's so fast and easy to mix up and bake. I hope you enjoy it as much as we do.
Black Eyed Pea’s Strawberry Shortcake

Makes one 9x13 pan or 12 cupcakes or one jellyroll pan
3 cups of flour
2 cups of sugar
1 1/2 TBS baking powder
1 cup melted butter
2 cups milk
1 1/2 tsp vanilla

Preheat oven to 350°
In a large bowl stir together the flour, sugar and baking powder
Stir in milk and vanilla then the melted butter and mix well.
Pour batter into a greased pan and bake in the preheated oven until golden on top and a toothpick comes out clean.
Around 25 to 30 minutes for 9x13 for cupcakes or 20 mins for jelly roll pan.

For a large half sheet pan 2”x13”x18” double recipe and bake for 40 to 45 minutes.

Thursday, March 25, 2010

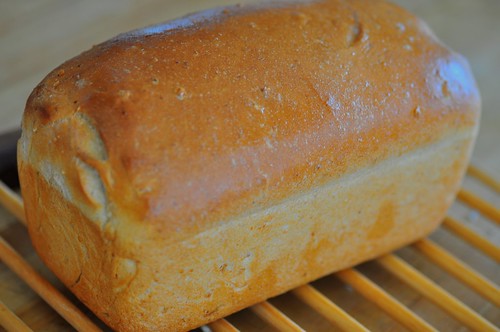
Honey Oatmeal Bread and a snow day!

One of my favorite things is a snow day. A snow day is like Christmas Eve, it's a gift of a day where you feel entitled to sit around, watch movies, play games and do some baking, all in your sweats.

My youngest is a senior this year and here it was the end of March and not even one snow day. I'd given up hope until yesterday.  It started snowing at 5pm and by 9 we had 6" of snow and by 10pm they had already called school.

I just made a batch of my favorite bread recipe with a touch of honey and a little bit of oatmeal.

                                          For a printable version of this recipe click here.
Perfect Honey Oatmeal Bread
This recipe will make 2 loaves.
1/4 cup warm water
1  package active dry yeast (.25 ounce) or 2 1/4 TBS of instant yeast
1 TBS white sugar
1 cup regular or quick cooking oatmeal
2/3 cup whole wheat flour
1 1/2 cups warm water
1/4 cup dry powdered milk (optional)
1 tsp salt
2 TBS honey
2 TBS brown sugar
1/4 cup vegetable oil or melted butter
3 cups white flour (bread flour if you have it, if not all purpose)
  1. If you are using regular or quick rise active yeast place 1/4 cup warm (under 110 degrees),  1 tsp sugar and the active yeast in a small bowl to proof the yeast, if you have instant yeast just mix the dry instant yeast into your whole wheat flour. 
  2. Into a large bowl of your mixer or any large bowl if mixing by hand add the warm water, dry powdered milk, oatmeal, honey, brown sugar, salt and oil or butter and stir to combine.
  3. Add the whole wheat flour and 2 cups of the white flour and combine well. 
  4. Continue to add the white flour until the dough comes together and is just barely tacky to the touch. Bread dough should not be smooth and dry it should be tacky to the touch but not pull off onto your hands. 
  5. Beat or knead until dough is elastic and when you poke it the dough springs back up. 
  6. Let sit covered for 5 minutes then knead again for 30 seconds. 
  7. Shape into a ball and place upside down in a bowl you have coated with vegetable oil. Turn ball over and cover the bowl with a damp cloth. 
  8. Let it sit until the dough has doubled in size.
  9. Dump out onto a floured counter top and roll out into an 18" wide rectangle. 
  10. Cut the rectangle into 2- 9" squares and roll up into a log pinching the seams and the ends. 
  11. Place into 2 greased 9" loaf pans and cover with a damp cloth. 
  12. Preheat your oven to 350°
  13. Let sit until doubled in size. 
  14. Place into a preheated 350° oven and bake for 30 to 35 minutes. They should sound hollow when tapped or use an instant read thermometer. It should read between 190° to 195° (don't forget to take 2 degrees off of that temp. for every 1000 feet of altitude you live at. i live at 6000 feet so I bake to a temp of around 180° to 185°)
  15. Remove from oven and pan and cool on a rack. My family doesn't lie a hard crust so I rum a tsp of butter over the crust to keep it soft.

    Friday, February 5, 2010

    German Pancakes, Dutch Babies, Oven Pancakes or Humps and Hills

    Call them whatever you like but they are simple to make and taste delicious. We've always called them Humps and Hills because our neighbors in Houston, The Parcell's, who introduced us to this recipe, called them that. Kids love them because they look so fun!

    Click here for a printer friendly version!
    • 6 large eggs
    • 1/2 tsp salt
    • 3 TBS sugar
    • 1 cup milk
    • 1 tsp vanilla extract
    • 2 to 4 TBS unsalted butter, melted
    • 1 cup unbleached all-purpose flour
    Place a 9x13" pam into your oven on the middle rack.
    Preheat the oven to 425 degrees with the pan inside
    Mix all the ingredients together until really smooth. You can do this in a blender or in a small mixing bowl with a hand mixer. The batter is thinner than a regular pancake batter, it's more like a crepe batter.
    Carefully remove the hot pan from the oven. Grease the bottom but not the sides of the pan and Pour the batter in. Place it back in the oven and bake for 20 minutes. Now- don't start checking it after 10 minutes. It will LOOK done after about 10 minutes but it will still be flat and not puffy- PUT YOUR HANDS UP AND STEP AWAY FROM THE OVEN! Leave it shut and let it do it's thing! OK, you can watch through the window if you promise not to open it!  When the buzzer rings, take out the beautiful puffy goodness and serve immediately. It will start to fall so you want everyone sitting at the table waiting.
    Serve it with any or all of the following. Sprinkled with some lemon juice and powdered sugar, sprinkled with cinnamon and sugar, plain old syrup or with fresh fruit and a dollop of whipped cream.

    Thursday, February 4, 2010

    Super Bowl food- Blue Cheese Sliders and Tamale Pie Recipes

    I love great game day foods!! Did you know that out of a 110 minute televised game there are over 45 minutes of commercials and 16 minutes of replays? That's a lot of time you could be eating.
    Here are a couple of recipes that I'll be making on game day.
    Tamale Pie 
    We eat this served over a bed of Fritos or over rice. You can also serve it like a hot dip and use the large Frito Scoops to eat it.
    It's filling and hearty yet you can make it ahead and just stick it into the oven when you're ready.
     2 pounds ground beef- You can also use Ground Turkey if you want 
    1 medium onion chopped
    Salt to taste
    2 TBS chili powder, divided 
    2 tsp cumin
    1 tsp dried oregano
    1- 16 oz can of crushed tomatoes and 2- 4-ounce cans diced mild green chilies or if you like it spicier- use 1 1/2 cups of salsa instead of the tomatoes & green chilies.
    2-16-ounce cans pinto or black beans, drained and rinsed

    Topping
    1 cup yellow cornmeal
    3 cups of water
    1 tsps. salt
    8 Ounces of grated sharp cheddar cheese

    Over medium-high heat, cook the meat and and the onions until the onions are golden brown and there is no pink left to the meat.
    Drain off any fat. Stir in 1 1/2 Tbs. of the chili powder, cumin, oregano  tomatoes or salsa, green chilies, and the beans,  simmer for about 5 minutes. 
    • This meat mixture can be made up to two days ahead then refrigerated until you are ready to use; Just reheat the mixture over medium heat until it begins to bubble and then continue with the recipe. 
    In a medium saucepan over medium heat bring 3 cups of water, cornmeal, remaining  1 1/2 tsps of chili powder and 1 tsps. of salt to boil stirring constantly, until the cornmeal is almost tender and the mixture is quite thick, 3 to 5 minutes. It will look like grits for my southern readers. To the Yankees, it will look like really thick cream of wheat cereal. 

    Preheat the oven to 350 degrees. Lightly coat a 9 x 13-inch baking dish with cooking spray. Spoon the beef mixture into the dish. Top with the cooked cornmeal and spread evenly to cover.


    Sprinkle the cheese evenly over the top. You can make it to this point andcover and stick it in the fridge for up to 2 days before baking.
    Bake until the cornmeal crust is set, the cheese is golden brown and the casserole is very hot at the center, 25 to 35 minutes if fresh made or 35 to 45 from fridge.
    Serve over rice or Fritos with any of the following optional toppings:
    Sour Cream         Sliced black olives             Fresh cilantro


    Blue Cheese Sliders (mini burgers) 
    Here is a twist on  a traditional slider. Packed with blue cheese, onion and bacon, they'll be the hit of the party.  These are also a ton easier than the recipes where you have to stuff the blue cheese between two patties of meat and seal up the sides. So not worth it!
    This makes 16 to 20 sliders depending on how big or small you make the patties.

    2 lbs of  ground beef
    2- 4 to 5 oz tubs of crumbled blue cheese
    1 bunch of green onion, finely chopped- I use scissors to cut up green onions, it's so much easier than trying to chop through them)
    Pepper to taste- I use about 1 tsp.
    8 strips of bacon cooked and crumbled
    16 to 20 small dinner rolls


    Combine the raw hamburger meat with the blue cheese crumbles, the chopped green onions,  black pepper and the crumbled bacon.
    Mix well to combine.
    Shape into small balls and then flatten them into patties.
    Grill or pan fry until they are cooked through.
    Serve on rolls with BBQ sauce or Steak Sauce

    Friday, January 8, 2010

    Old El Paso Green Chilies and Tackle the Taste Giveaway!!!


    The Superbowl is one month away on February 7th and have I got a fun giveaway for you.
    I will choose one (1) of my readers to win a "Tackle the Taste” gift pack that includes two free cans of Green Chiles, a football-shaped ceramic chip and dip, a package of football-themed plates a package of matching cocktail napkins, and a football field table runner all provided and mailed directly to you by Old El Paso and Blog Sparks! 
    They also sent one of these sets to me as a thank you! Of course one of my kids immediately put dibs on it and will be using it for their Super Bowl Party. It was so cute too!!
    Even if you don't want to enter the giveaway, everyone can click HERE to download a $0.55 coupon good on one can of Old El Paso Green Chiles- that's a deal!
    Here's how to enter: All entries must be in by January 15th so that, hopefully, you will be able to receive your gift pack by Superbowl Sunday! That's not in my control but the sooner the better, hence the one week deadline. 
    Please make sure that you have your profile set to public! If you don't then I have no way of getting your email to tell you that you are a winner and get your mailing address to send off to Old El Paso. If you don't want to make yourself public, once you have entered, email me by clicking the link at the top of my page and let me know you are entering and give me your email that way. Thanks.

    1. YOU MUST DO THIS FIRST or all other entries will be DELETED! Please let me know how you're going to use Old El Paso Green Chiles to spice up your favorite recipe(s)(1 entry)
    BONUS ENTRIES
    2. Follow Me on Blogger (1 entry) If you are a follower already, leave a separate post saying you already are a follower.
    4. Follow ME on Twitter (1 entryAlready follow? Leave a post. I do check!!!
    5. Leave a Tweet and the direct link to that tweet (1 entry) You can do this Daily!
    6. FOR 5 EXTRA ENTRIES - Blog about this giveaway, including a link to my blog and come back and leave the link to your blog post. Once you have your post up- leave FIVE separate comments  here, that you've blogged about the giveaway.
    7. FOR 3 EXTRA ENTRIES-Add my  BUTTON to your sidebar (leave 3 Separate comments here saying that you've done this)
    8. Add Factwoman to your blogroll (using my URL), with a link back to me! (leave 1 comment here telling me you've done this)
     This giveaway is only open to U.S. entrants.
    Many thanks to MyBlogSpark & Old El Paso for this Giveaway Opportunity!

    No Purchase Necessary. Void where prohibited by law. I was provided a product or sample for this Review and Giveaway blah blah blah blah. 

    Tuesday, December 22, 2009

    Shortcut recipes for this busy week. Peppermint layered brownies and a Creampuff Christmas Tree tower!

    I had to make some food for an event on very short notice this past week and came up with a couple of shortcut recipes you might want to try out yourself.

    First, I love the 3 layer Peppermint Brownies I make every Christmas but I knew that I would be too busy to get a batch made up with only a couple of hours notice so I did the next best thing. I ran to Sam's club and bought some premade brownies and them added the layer of peppermint frosting and the chocolate on top. They took about 40 minutes with 25 of that being a quick chill in the freezer and cutting! Not bad. The great thing is that they tasted just as good a homemade. Just go to the recipe and skip the brownie part.

    The other thing I came up with was for a party I had forgotten about and I needed to bring a dessert. I grabbed some frozen cream puffs out of the freezer and made a Christmas tree with them.

    Here's how I did it.
    Take a box of frozen cream puffs- about 48
    3/4 cup of white sugar
    1/4 cup chocolate chips melted- use only if you need to transport the tree to a party. If you're serving it at home you won't need this. I'll fess up and admit that I used the melted sugar as the glue. Not one of my better ideas, first of all, I burned the crud out of my fingers more than once, melted sugar is HOT. Second of all, the dang sugar is such great HARD glue that we had to pry the puffs apart, breaking some of them. Not the dainty pickup a creampuff picture I had in my head!!!
    1. Melt the 1/4 cup of chocolate chips in a small bowl. Again- if you're serving these at home, just stack the creampuffs and skip to step 4.
    2. Make a base of cream puffs in the shape of a circle. Us a tiny drop of the melted chocolate between them to act as glue.
    3. For the next layers, put a small drop of the melted chocolate on the bottom of each creampuff and stack them up into a tree shape.
    4. Into a small sauce pan, place the 3/4 cup of sugar. Turn the heat to medium high and watch carefully as the sugar melts- DON'T stir- just watch, when the suger begins to get medium brown, you can swirl the pan GENTLY to get any unmelted sugar to mix in. When all of the sugar is melted and a medium golden brown. Immediately remove from the heat. 

    • Dip a fork or a tined whisk into the melted sugar and wave back and forth over the pan until the sugar starts to create threads/ Once you begin to get threads, dip and wave over the top of the tower of creampuffs. I'm no expert so I ended up with dropletts and the intended threads of sugar. It still looked and tasted great.
    • Continue doing this until you have the coverage you want. If the sugar gets to thick put it back on the stove for a few seconds to warm it up a touch.
    • Serve!!!

    Monday, December 7, 2009

    Sangria for the Holidays


    Sorry only had my cell phone camera with me so this picture is not very good!!!

    Last night I went to a Christmas Party with a group of friends. Everyone brings an appetizer and we all talk until we're hoarse. The hostess with the mostess made this amazing sangria for the party and it was delicious. This recipe is fast, easy and doesn't contain the hard liqueur the many sangrias have.
    Sangria is basically a combination of fruits, fruit juices and wine. There are thousands of recipes out there and it's fun to play with the different combinations. Many people think of Sangria as a summertime drink but I think that it's festive and perfect for winter holiday parties, especially when made with red wine. The site Wine Intro.com has over 80 Sangria Recipes if you want to try a few out.
    Sangria is also a great money saver for a large party because you can use an inexpensive wine, I usually use a $5 to $8 range wine in sangria. I've even used 2 buck Chuck in a spiced sangria for a huge crowd.

    Here's how my friend made it.
                       1/3 C sugar
                       1/3 C lemon juice
                       1/3 C orange juice
                       1 Bottle of red wine, 750ml size
                       1 orange, thinly sliced
                       1 lemon, thinly sliced
    1. In a large pitcher, add the 1/3 C sugar, 1/3 C lemon juice, and 1/3 C orange juice 
    2. Stir until the sugar is dissolved.  
    3. Add one bottle red wine.  
    4. Thinly slice oranges and lemons and place into the pitcher with the wine mixture.
    5. Chill and serve.
    That's it, you are good to go and ready for a party. You can make this a few days in advance and stick in the fridge until you're ready to serve it. The sangria was the hit of the party.

    Here is the recipe for a spice sangria that I got years ago from a friend in Houston who served it at a Christmas party as well. It has a warmer flavor because of the spices.
             1 cup of cranberry juice
             1/2 cup sugar
             4 whole cloves
             1 cinnamon stick
             2 lemon slices
             3 orange slices
             1 750ml bottle of red wine
             2 to 4 tablespoons of brandy or triple sec depending on how orange flavor you want.
             1 orange (unpeeled), washed and thinly sliced
             1/2 cup of fresh cranberries
             1 cup club soda
    1. In a small saucepan, place the juice, sugar, cloves, cinnamon stick, lemon slices and orange slices. 
    2. Bring this mixture to a boil over medium heat, then reduce the heat to low. 
    3. Simmer on low for 10 minutes. 
    4. Remove from the heat and let sit for at least an hour to cool. 
    5. When it's cooled completely, strain it (or just scoop out the chunks) into a large sealed container and add the bottle of wine and the liquor.
    6. Place in the fridge to chill. You can do this up to 3 days before serving.
    When it's party time, pour the sangria into your serving container. Add the club soda, the orange slices and the fresh cranberries to the sangria. To keep it chilled, you can freeze cubes of oranges and use them as ice cubes.

    Wednesday, December 2, 2009

    Homemade marshmallows and cocoa mix make great teacher gifts or neighbor gifts!


    Here is an easy gift to make for teachers, neighbors or friends. Marshmallows and cocoa mix. If you've never made marshmallows, I hate to be the one to tell you that they are super simple and very impressive. I love making peppermint marshmallows to put in cocoa but you can make plain or if you just want them to eat, then try rolling them in toasted coconut or even chopped nuts.


    Homemade Marshmallows:

    * 3 packages unflavored gelatin
    * 2 cups granulated sugar
    * 1/2 cup light corn syrup
    * 1/4 teaspoon kosher salt
    * 1 tablespoon pure vanilla extract
    * Confectioners' sugar, for dusting

    Sprinkle powdered sugar into 2 8"x8" pans or one 9"x13" until bottom is completely coated.
    Pour the gelatin and 1/2 cup of cold water into the bowl of an electric mixer fitted with your whisk attachment and allow this mixture to sit while you make the syrup.

    In a large saucepan, preferably one that has a spout, combine the sugar, corn syrup, salt, and 1/2 cup water in a small saucepan and cook over medium heat until the sugar dissolves. Place the lid on the pan for 1 minute to wash down the sides of the pan. Raise the heat to high and cook until the syrup reaches 240 degrees F on a candy thermometer. If you live at higher altitudes, reduce the final temp by 2 degrees for every 1000 feet in altitude. I live at 6000 feet so I only cook my mixture to 228 degrees. Remove from the heat.

    Turn the mixer onto low speed, while mixer is going, slowly pour the sugar syrup into the dissolved gelatin. The gelatin will be all chunky when you turn on the mixer. Once all of the syrup is poured in turn the mixer up to high speed and whip until the mixture is very thick, about 15 minutes. Add the vanilla and mix thoroughly.


    Pour the marshmallow batter into the prepared pans and smooth the top of the mixture with damp hands. Sprinkle with powdered sugar or whatever topping you are using.

    For the peppermint, I removed half the marshmallows for the plain pan and then stirred in 2 drops of red food coloring and 1/2 tsp of peppermint flavoring into the remaining half. After placing this into the second pan I sprinkled crushed peppermints over the top.

    Allow to dry uncovered at room temperature overnight.

    Remove the marshmallows from the pan and cut into squares. I dip a knife into very hot water before each cut then roll each strip in powdered sugar before cutting into squares. Roll the sides of each square carefully in confectioners' sugar.
     

    Once they have dried for a few hours and aren't sticky, they  can be bagged up for gifts or stored in a  sealed container or sealed baggies.

    Creamy Cocoa Mix
    This makes 20 cups of mix or about 60 servings. I make a big batch at the beginning or the winter and we use it all season.

    • 13 cups dry milk powder
    • 6 1/2 cups sifted confectioners' sugar
    • 2 1/2 cups unsweetened cocoa powder
    • 2 1/2 cups powdered non-dairy creamer (1- 15oz jar of powdered creamer)
    Sift together all these ingredients into a large bowl. 
    For extra chocolaty goodness I  add-
    • 2- 12 oz package of mini chocolate chips 
    stir to combine the scoop into jars for gifts or store sealed in a container for storage.

    Variations- You can use flavored creamer if you want flavored cocoa or try adding some cayenne pepper to the mix for a bit of spicy heat. 

    To use this cocoa mix; Scoop 1/3 cup of mixture into mug and add boiling water. Stir and enjoy.

    Alton Brown has a Recipe for Cocoa mix that I haven't tried just because I love the creaminess of my recipe but for those who don't want to use powdered creamer here is his recipe.
    • 2 cups powdered sugar
    • 1 cup cocoa (Dutch-process preferred)
    • 2 1/2 cups powdered milk
    • 1 teaspoon salt
    • 2 teaspoons cornstarch
    Mix all ingredients together and store in airtight container.


    Don't forget to post your Holiday recipes and your Christmas cookie recipes for the 25 days of Christmas Recipe Exchange by clicking these links here or the buttons at the top of the page.

    Friday, November 27, 2009

    The 25 days of Christmas Recipes Exchange

    It's begun!!! Today is the start of The 25 Days of Christmas Recipes here and the 25 days of Christmas Cookie Recipes over at Buttercream Lane. Grab the button


    and share your favorite Christmas Recipes with us. Write a post on your blog with your recipe and link it up using the Mr Linky below. Please link to the actual recipe post not just to your blog so that we can find the recipes easier. It would also be great if in the Your Name box- Put your name and then the name of the recipe for easier browsing. I can't wait to see all of your recipes. Let the cooking begin.

    Wednesday, November 25, 2009

    Bourbon or Rum Sauce for all your pies!


    This is the best sauce for any kind of pie. We eat it on apple, pecan, and pumpkin pies at Thanksgiving. It's the sauce that they serve at a restaurant called Pappadeaux's Restaurant in Houston. It is thick and creamy and not too sweet. The perfect compliment to a pie, cake or even a spoonful stirred into a cup of coffee. Happy Thanksgiving!

    Bourbon Sauce

    • 1 1/2 cups of whipping cream
    • 1 cup of milk
    • 1 small box of vanilla instant pudding mix
    • 3 TBS Bourbon, whiskey, brandy or rum
    • 1 tsp of vanilla
    Pour the cream into a medium mixing bowl and beat just until it starts to thicken.
    Add the milk and beat to combine
    Slowly beat in the instant pudding mix
    Add the vanilla and liqueur and continue whipping until it is well blended and is a thick sauce consistency. It should be almost as thick as pudding and shouldn't be runny. 
    Place into a sealed container and refrigerate for at least one hour before serving. It will thicken up as it sits. This can be made a day ahead as it stores very well.

    Monday, November 23, 2009

    Monday's Household Assigments- Thanksgiving Checklist & Cranberry Sauce.

    Happy Thanksgiving!!! This week, it's time to prepare for Thursday.  Here are some suggestions to plan your week and have a successful Thanksgiving.
    If you are not cooking dinner then you won't need all of these but it can still help you get ready. 
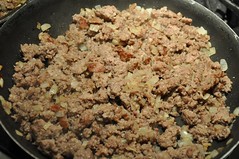
    • Plan your menu and write it down. Write down how long each item takes to cook and where it is cooked, stovetop, oven, and temps. I've already posted some of the recipes that I use for Sausage Stuffing/Dressing and an apple cranberry pecan version, Sweet Potatoes, and How to Brine your turkey.
    • Write out your shopping list based on your menu. Go through each menu item and make sure you have each ingredient. I set out the recipe and then pile all of the non-perishable ingredients with the recipe on the counter so that it's all together. 
    • Now plan out what you are going to do or make each day. For instance, your cranberry sauce can be made days ahead so it can be done Today. I make my Sweet Potatoes on Wednesday, my pies on Wednesday and part of my stuffing on Wednesday. This means I have far less to do on Thursday and it gives me more time with family and friends. 
    • Lastly- make a time schedule for Thursday. I figure out what time I want dinner and work backwards from that. So if the turkey takes 3 1/2 hours and we want to eat at 2pm then I need to start working with the turkey at 9:30 am. I will rinse the turkey, put a cut up onion, a quartered orange and some fresh sage into the bird. I will rub the skin with some butter and get it into the preheated oven by 10 am. It will bake for 3 1/2 hours and then it needs to sit covered for 30 minutes out of the oven before carving.  The green bean casserole takes 45 minutes so it needs to go into the oven by 1:15. Etc.  This helps make sure that all the items for dinner will be ready at the same time.
    • Do as much as you can before Thursday. I even set out the dishes and silverware onto the table on Wednesday. I put the serving bowls for each item with the serving utensils and a post it note on it so that I know what food will go into it.  The key is to think it all through and write it al down. I have the schedule typed up on my computer to use year after year.  Careful planning will help make your holiday stress free, at least from a cooking standpoint, I can't do anything about your family stress. 
    As we were driving on Saturday I got a text message from my son with the picture below and he told me that he was making cranberry sauce. I of course asked where he was, I thought he was with my daughter and helping out. Turns out he was at his house making it all by himself for an early Thanksgiving dinner with some friends.   I'm was so impressed that he made it all by himself. I asked my son to send me a photo of the sauce in the serving bowl to post. He informed me that that that would be impossible because he didn't have a bowl. I found out that his house has no real dishes. He said that guy houses don't need dishes and that's what girl's houses are for. Girls have dishes, that's why guys date girls. I laughed so hard. Well here's his recipe for Orange Cinnamon Cranberry sauce and the recipe that I've used for years for Regular whole berry Cranberry sauce.

    Regular Whole Berry Cranberry sauce. This is the version from the Ocean Spray package.
    1 cup granulated sugar
    1 cup water
    1 (12-ounce) package Fresh or Frozen Cranberries, rinsed and drained
    1. Combine water and sugar in a medium saucepan. Bring to boil; add cranberries, return to boil. Reduce heat and boil gently for 10 minutes, stirring occasionally. Cover and cool completely at room temperature. Refrigerate until serving time.
    Makes 2 1/4 cups


     Tom's Orange Cinnamon Cranberry sauce

    1 (12-ounce) package Fresh or Frozen Cranberries, rinsed and drained
    1 Cup of orange juice
    1 cup of brown sugar
    1 1/2 cinnamon sticks
    the zest from half an orange. 
    Place the washed cranberries, orange juice, brown sugar, and cinnamon sticks into a medium sauce pan. Add enough water to cover the berries. Bring all the ingredients to a boil over medium high heat. Reduce heat and simmer for 45 to 55 minutes or until the sauce is thickened. Remove from heat and cool with the lid on. Once it has cooled, remove the cinnamon sticks and discard them. Serve. 
    Doesn't it look good? 
    I made it this afternoon and my mom made a batch of it as well. 

    We both think that this cranberry sauce is absolutely delicious. She said that she tasted it periodically throughout cooking time and took the cinnamon stick out about halfway through so that the cinnamon taste didn't dominate. I love cinnamon so I left it in the whole time. Just keep testing it and pull the sticks out when it has the amount of cinnamon taste that you like. 

    Happy Thanksgiving and I hope that you have a wonderful time thanking God for the blessings in your life.

    Sunday, November 22, 2009

    Step by Step Instructions on How to Brine a Turkey!


    If you've ever had a dried out turkey, you should consider brining the bird before cooking it. Brining is really easy and adds flavor, and moisture to any kind of meat. Here is a great article on Why Brining Keeps Meat so Moist. Brining not only adds moisture it adds flavor. Here is how I brine my Turkeys. There are lots of different recipes for brining meat out there. Really you can just use a salt and water mixture but I prefer to add some additional flavors and I don't like my food too salty so I use a combination of salt and sugar for my brine


    You will need to find the XL Ziploc storage bags or XXL that are sold for storing items in. Ziploc's are so strong and thick that they afre perfect for this task.  
    4 qts of water and 3 quarts of ice
    2/3 cup Kosher salt or 1/3 cup table salt
    1c brown sugar
    3T black peppercorns
    1 can of frozen apple juice concentrate
    2 Bay leaves
    6 cloves or 1/2 tsp of ground cloves
    A one inch piece of ginger root- sliced or 1/2 tsp ground ginger
    1 onion, sliced
    1 orange, sliced
    2 apples, sliced
    • Place your bag open with the sides folded out on the counter. 
    • Find a plastic tub that is big enough for the turkey to sit in. 
    • Pour 4 cups of water into a saucepan and add the salt, brown sugar, cloves, ginger and pepper corns. 
    • Over medium high heat, stir until all the sugar and salt are dissolved. Set aside to cool. 
      • Peel the onion and slice into 1/4 inch slices- really any size slices will do. This doesn't  have to be exact!
      • Slice the apples and the orange- No need to peel or core them. 
      • Pour 4 qts of water and 8 to 10 cups of ice into the bag.
      • Add the apple juice concentrate to the salt and sugar solution and stir to melt then pour this into the big bag with the ice and water.
      • Add the fruit, onions, and bay leaves to the bag. 
      • Remove the turkey from it's packaging and remove the neck and the giblets from the cavities. 
      • Rinse the turkey inside and out.
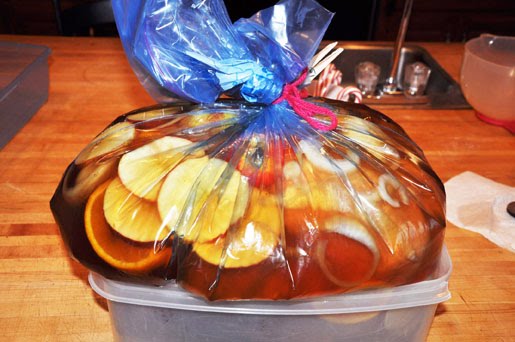
      • Place the turkey into the bag and place a few slices up on top.
      • Now squeeze the bag and push as much of the air out as you can. I zip the top almost closed and then squeeze. Once all the air is out, I close the zip top then gather the top up and tie it with some string or yarn to hold the bag tight so that the entire turkey is covered with the solution. 
      •  Set the bag into the plastic tub and set into a refrigerator for 12 to 24 hours. 
      I start brining the turkey on Wednesday afternoon then take the turkey out of the brine on Thursday morning Throw away the brining solution,  rinse the turkey inside and out, dry it off then place it back into the empty plastic tub and set it in the fridge for a few hours so that the turkey has time to really dry before going into the oven. That's all there is to it.